Are you like me and have a hard time throwing anything away? I'm always thinking in the back of my mind....I'm sure I can do something with that. So today we will talk about my obsession with anything cardboard. Yes I have two containers full of toilet paper rolls. I know it's a little crazy but what's even crazier is my MIL came over last week and asked if she could throw some of them away and I panicked a little. You know, I have been saving those for a long time for something :) So I decided that the annual halloween party might be a good time to part with some of them. Here is what I came up with - Toilet Paper Halloween Party Favors. I just squeezed one end together sewed up the end, Stuffed some tiny treats in there and squeezed the other end another way and sewed it up, Punched a circle, cut out a bat and slapped it on there. I think they turned out really cute and they look like those sour cream containers everyone is making nowadays. If you covered the roll with paper first they would probably be even cuter.
I get bored easily. This blog is to document all my crazy hair brain ideas and to share my adventures along the way.
Thursday, October 13, 2011
Tuesday, October 4, 2011
Multiplication Fun
Natalie made it through the 4's with our last game so this week we made up another game for 5's.
Here's what I needed:
Electrical tape
Lazy Susan
Scrapbook Number stickers
Here's what you do:
Section off Lazy Susan into sections for numbers 0 - 12
Create an arrow on the table out of electrical tape
Place scrapbook # stickers 0-12 in each section
Start spinning and have fun.
5 multiplied whatever # the arrow is pointing to after each spin.
Saturday, September 24, 2011
Birthday Gift Packaging
We created this Birthday Present in a bottle for my daughters BFF. We stuffed it with fingernail polish, lip gloss, bracelets, nail care kit, makeup case, etc. We couldn't find a way to wrap that we liked so I spotted a two liter bottle I had been keeping for something else and wallah the birthday gift in a bottle was created for her
What you need:
A 2 liter bottle
An instrument to poke a hole in a bottle(I use my corn holders)
A pair of scissors
Adhesive(Tape, Glue Dots, or Tape Runner)
Scrapbook Paper or Fabric to put around bottle
Stamps(optional)
Ribbon(optional)
Here's what you do:
1.) Clean out a 2 liter bottle
2.) Poke a whole in the middle of the bottle as shown
3.) cut a flap into the bottle with scissors
4.) Wipe out any excess water that may be left in the bottle
5.) Stuff with gifts
6.) Tape flap shut with scotch tape(you don't want to use anything stronger because it will be too hard to remove later)
7.) Measure paper around bottle and use adhesive to stick on bottle. I used an adhesive runner but glue and or tape would work as well.
8.) Stamp name and adhere to bottle
9.) Tie Ribbon around bottle
It's that easy and my daughter is really excited about giving the "bottle" of goodies to her friend.
Thursday, September 22, 2011
Dollar Store Crafts
Woohoo! My crow invitation idea was featured on Dollar Store Crafts. Go check it out :)
http://dollarstorecrafts.com/2011/09/make-crow-halloween-party-invitations/
Wednesday, September 21, 2011
Multiplication Fun - Playing Cards
Natalie made it through the 3's without a hitch. Woohoo! The egg carton was fun and we may revisit for another set of #'s but for now it's adios egg carton game and hello playing cards. For the 4's we will be using our "modified" set of playing cards to play card games to help learn and reninforce our 4's multiplication tables. Last night we played pick a card, high card, and another game we made up.
Here's what you do:
Find a set of playing cards...old ones are preferred because we are marking them up a little. If you have rook cards you wouldn't have to mark them up, but I didnt' want to lose my rook cards so I bought a cheap deck of cards and got the markers out.
Get out the A-K and mark them up. If you have a joker to use as a zero you can get out the A-Q. I made my Ace a 1, Joker a 0, Jack a 11, and Queen a 12.
For the first game I shuffled the cards and spread them out in my hand. I said pick a card any card to make it more fun and she started selecting. When she selected the card she had 5 to 10 seconds to shout out what 4 multiplied by that number is. If she got it right she won the card. Whoever had the most cards when all cards were selected wins.
Next Game I divided the cards into 2 stacks. We then both flipped our cards over and yelled the answer to what 4 multiplied by the number was. Whoever had the highest card one.
The next game is basically the same with the exception that I spread the cards out to look like a memory game and we flipped the cards that way. Since there is an uneven number of cards whoever wins the last set, wins the remaining card if they get the answer right.
We had a good time "playing cards" last night while learing multiplication.
These games are fun for your child and they almost forget they are learning at the same time. In addition to the games we play we also every couple of days make a practice test and set the minute on the oven timer to make sure she is getting the information from the games to the paper. This helps reinforce learning and gets her practice for how the test will be in the classroom.
I hope you have fun mixing it up a little. Check back in two weeks. Hopefully we will be soaring to our 5's.
Tuesday, September 13, 2011
Halloween Party Game
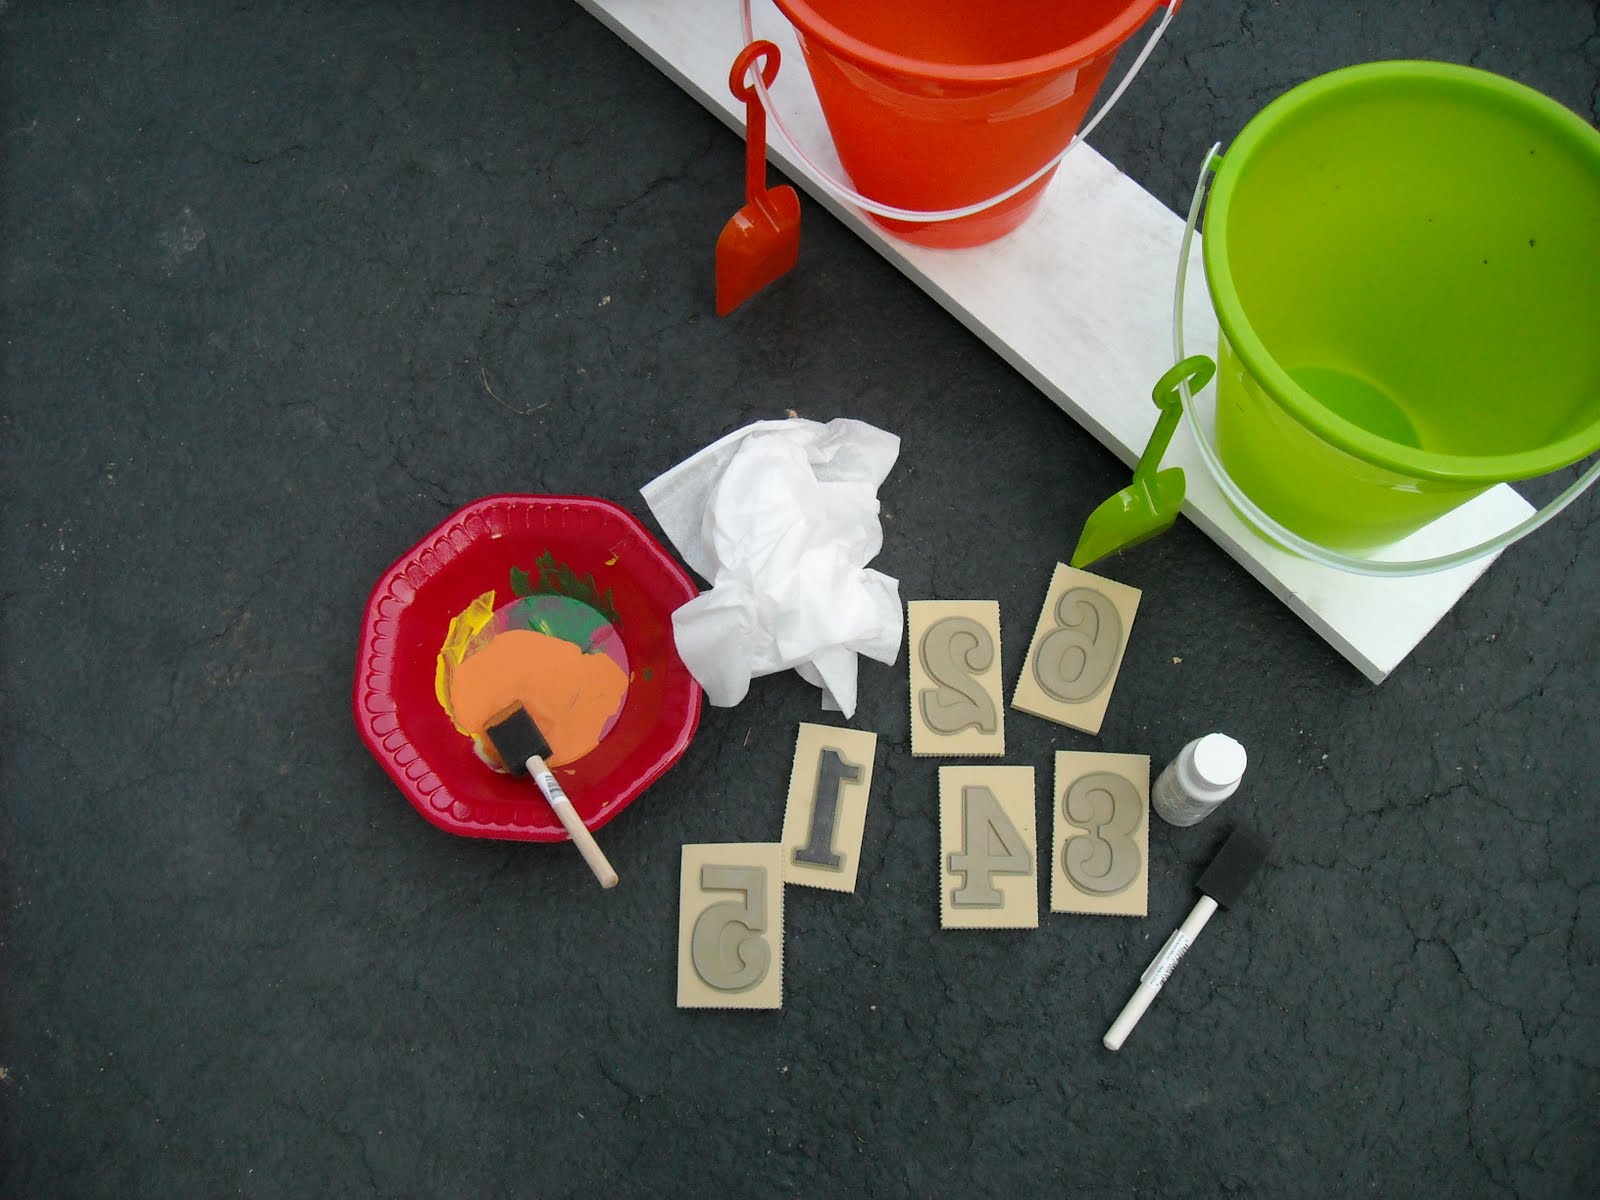
I love creating new games for my annual halloween party. I found this idea on a birthday blog somewhere-I really should keep links but it's a downfall I just draw out the idea in my idea book and forget where it came from. If it's yours please claim it, I do not take ideas intentionally without saying where they came from..PROMISE. I took several pictures to show the steps that it took to make this cute game. Without further ado here they are for your viewing pleasure :)
What you need:
Board
Spray Paint (optional)
Buckets
Bolt and Nuts
Stencil (optional)
Paint (optional)
Step 1: Find a Board big enough to sit all your buckets on. I had 6 buckets but you can do less or more.
Step 2: Paint the board whatever color you want (I used spray paint)
Step 3: Place buckets on board and trace around them
Step 4: Drill holes in center of circles that you drew on board
Step 5: Drill holes in bottom of buckets. I learned the hard way that you should stack all the buckets together before drilling through the bottom. That way they will not split.
Step 6: Place the bolt on the bottom of the board and then place the bucket on top of it. Then thread on the nut inside the bucket.
What you need:
Board
Spray Paint (optional)
Buckets
Bolt and Nuts
Stencil (optional)
Paint (optional)
Step 1: Find a Board big enough to sit all your buckets on. I had 6 buckets but you can do less or more.
Step 2: Paint the board whatever color you want (I used spray paint)
Step 3: Place buckets on board and trace around them
Step 4: Drill holes in center of circles that you drew on board
Step 5: Drill holes in bottom of buckets. I learned the hard way that you should stack all the buckets together before drilling through the bottom. That way they will not split.Step 6: Place the bolt on the bottom of the board and then place the bucket on top of it. Then thread on the nut inside the bucket.
Friday, September 9, 2011
Fun Ways to Learn Multiplication
Natalie is in 3rd grade and they are learning their multiplication tables. She is her mother's daughter in that she gets bored easily :). She mastered her two's by just doing the boring old let's practice your multiplication table and I'll set the timer to one minute on the oven but when it came to 3's she was a fussy mussy. She didn't want to practice them. I tried playing a game in the car where I asked her one and then she asked me one but that only lasted about 5 minutes before the boredom and I don't want to do this syndrome rolled in. I feel for her. I was getting sick of asking them to her as well. So for each set of numbers I plan on coming up with a fun way to learn the set of multiplication tables. So without further ado...Here is week 1 for the 3 times table but you could use it for every # if you want.
Here is what I did for the 3's:
- Go to Fridge
- Pull out an Egg Carton
- remove all Eggs (otherwise this could get messy)
- Take a pen or sharpie in my case and write the #'s 0-11 in the holes where the eggs go
- Then write a 12 on the bottom flap
- Cut off the top of the carton with scissors or it rips off pretty easily
- Get a piece of candy or some other object that will fit in the holes of the egg carton and start tossing
How to Play
- Take "tossing object" and throw toward Egg Carton
- Mom or whoever is over "the game" yells 3 times "whatever # you land in" and the child yells out the number. If the object does not go into a hole that's when they have to answer 3 times 12.
So far we have played 2 nights in a row and my daughter can not get enough of it.
I hope you enjoy this game. Check back for more ideas as we go through the entire multiplication table.
Saturday, September 3, 2011
Easy Halloween Crafts
My daughter is always saying she is bored. So we ripped up some fabric today and started on some halloween crafts. We started with styrofoam bases for the mummy balls and the candy corn cones. We ripped up some fabric and started wrapping it around. I love crafts that don't have to look just right. Here's how we did it:
For the mummy balls we used:
round styrofoam balls
Muslin Fabric
small piece of Black Fabric
Glue
Tape
Scissors
Googly Eyes
tape a piece of small black fabric on ball
start wrapping muslin strips around ball
tuck in end of fabric to finish
glue on googly eyes
Done!
Project time: 20 minutes for 5 balls
Candy Corn Cones
What you need:
Orange Fabric Strips
Yellow Fabric Strips
White Fabric Strips
Cones in various sizes
Rip pieces of fabric in approx 1 inch strips
Start at the bottom of cone and wrap the orange fabric
Overlap next layer of yellow fabric and then white fabric, tuck end of white fabric under
Done!
Project time: 10 to 20 minutes for 3 cones
Give it a try. It's quick, easy, and cute and that's my kind of craft.
Subscribe to:
Posts (Atom)